> ## Documentation Index
> Fetch the complete documentation index at: https://docs.open-ci.io/llms.txt
> Use this file to discover all available pages before exploring further.
# 導入 (Getting Started)
> OpenCI のドキュメントへようこそ
## 準備 (Prerequisites)
OpenCI を自身でホスト(セルフホスト)するには、以下の前提条件を満たす必要があります。
* M1 以降のチップを搭載した Mac
* macOS 14.0 以降
## 初期設定 (Initial Setup)
OpenCI をセルフホストするには、いくつかのツールをインストールする必要があります。
### Tart
Tart は、macOS 仮想マシンを管理するためのツールです。
```bash macOS
brew install cirruslabs/cli/tart
```
### Firebase CLI
OpenCI は Firebase を使用するため、Firebase CLI をインストールする必要があります。
```bash macOS
curl -sL https://firebase.tools | bash
```
### OpenCI Runner
OpenCI Runner は、OpenCI を実行するための CLI です。インストールには Dart が必要です。
```bash macOS
dart pub global activate openci_runner
```
```bash install Dart
brew install dart-sdk
```
### ベースイメージのダウンロード (Download Base Image)
OpenCI は macOS 15.0 をベースイメージとして使用します。これにはかなりの時間がかかります。
```bash macOS
tart pull ghcr.io/open-ci-io/sequoia:0.0.4
```
## Firebase の設定 (Firebase Configuration)
OpenCI はバックエンドなどのコンポーネントに Firebase を使用します。そのため、Firebase の設定が必要です。
### Firebase プロジェクトの作成 (Create a Firebase Project)
任意の Google アカウントで [Firebase サイト](https://console.firebase.google.com/) にアクセスし、プロジェクトを作成してください。
### Firestore の設定 (Firestore Configuration)
Firestore はビルドジョブの登録に使用されます。Firestore にアクセスしてプロビジョニングを行ってください。
### Firebase Functions の設定 (Firebase Functions Configuration)
OpenCI は Firebase Functions を使用します。Firebase Functions の使用には、Blaze プラン(有料)への登録が必要です。費用は月額数円程度です。
### Firebase の初期化 (Firebase Initialization)
Firebase プロジェクトの作成後、使用するプロジェクトを指定します。
```bash macOS
firebase use project-id
```
### Firebase Functions のデプロイ (Firebase Functions Deployment)
OpenCI CLI リポジトリをクローンします。
```bash macOS
gh repo clone open-ci-io/openci
```
## GitHub App の設定 (GitHub App Configuration)
OpenCI は、ビルドジョブの取得に GitHub App を使用します。
### GitHub App の作成 (Create a GitHub App)
[GitHub App の作成](https://github.com/settings/apps/new) にアクセスし、GitHub App を作成してください。
## シークレットの設定 (Secret Configuration)
Firebase Functions で使用する GitHub App のシークレットを Google Cloud Secret Manager に登録します。
`/apps/firebase_functions/functions/` に移動してください。
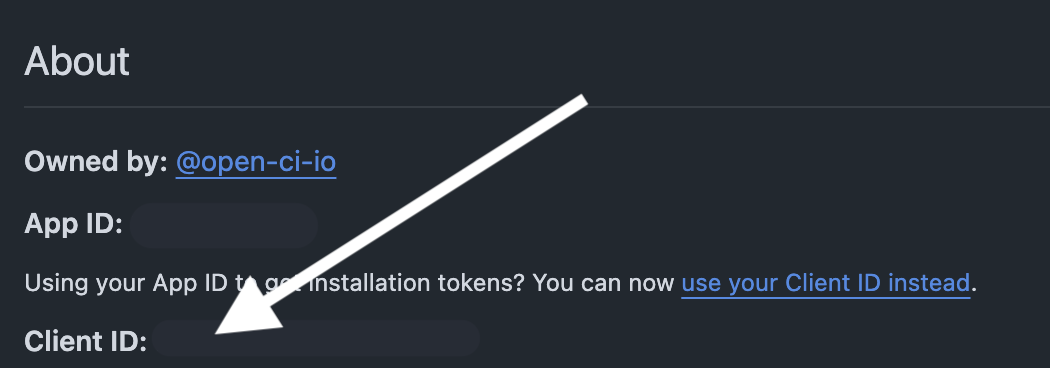
#### CLIENT\_ID
GitHub App の Client ID です。
 ```bash macOS
firebase functions:secrets:set CLIENT_ID
```
#### CLIENT\_SECRET
GitHub App の Client Secret です。生成する必要があります。
```bash macOS
firebase functions:secrets:set CLIENT_ID
```
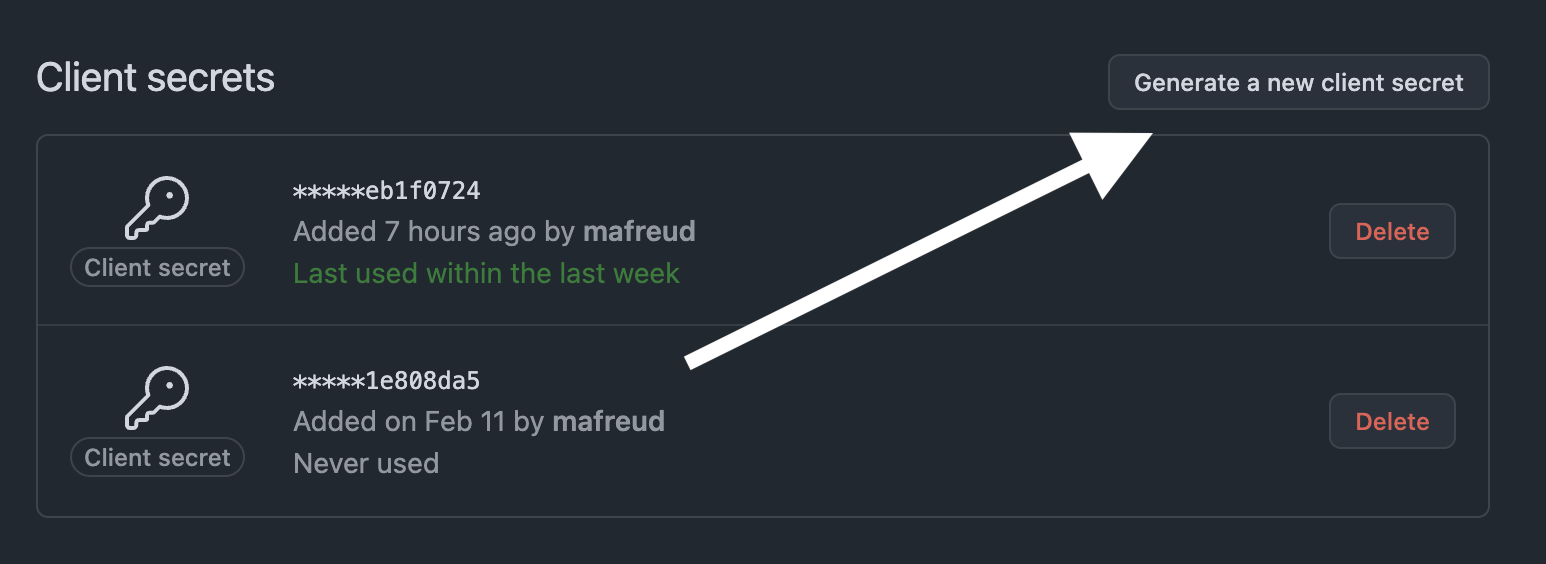
#### CLIENT\_SECRET
GitHub App の Client Secret です。生成する必要があります。
 ```bash macOS
firebase functions:secrets:set CLIENT_SECRET
```
#### GITHUB\_APP\_ID
```bash macOS
firebase functions:secrets:set APP_ID
```
#### GITHUB\_WEBHOOK\_SECRET
GitHub から送信される Webhook の信頼性を検証するために使用される「ランダムな秘密の文字列」です。
次のように文字列を生成します。
```bash macOS
openssl rand -hex 32
```
生成された文字列を Firebase Functions で `GITHUB_WEBHOOK_SECRET` に設定します。
```bash macOS
firebase functions:secrets:set GITHUB_WEBHOOK_SECRET
```
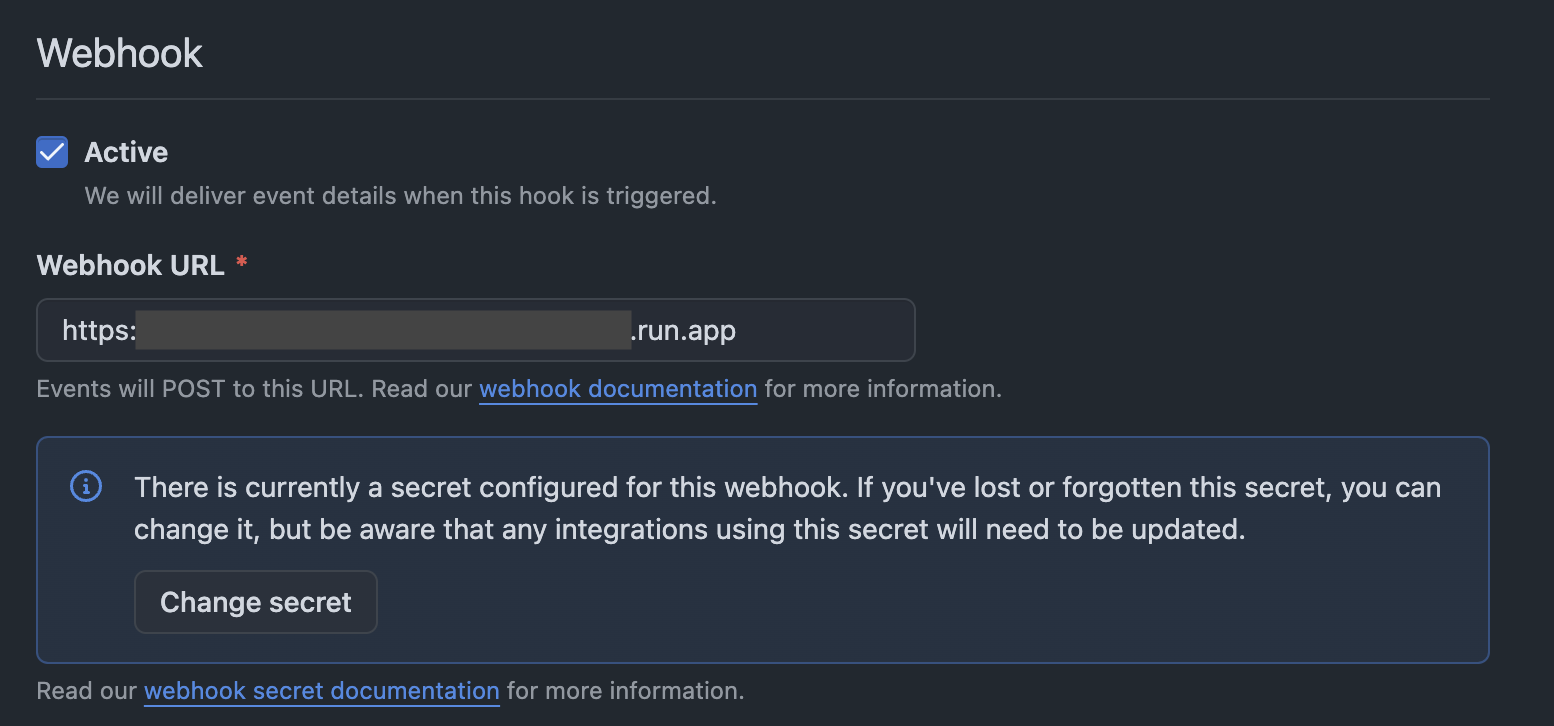
次に、この文字列を GitHub App の Webhook Secret に設定します。
Webhook の設定は、次のようになれば完了です。
```bash macOS
firebase functions:secrets:set CLIENT_SECRET
```
#### GITHUB\_APP\_ID
```bash macOS
firebase functions:secrets:set APP_ID
```
#### GITHUB\_WEBHOOK\_SECRET
GitHub から送信される Webhook の信頼性を検証するために使用される「ランダムな秘密の文字列」です。
次のように文字列を生成します。
```bash macOS
openssl rand -hex 32
```
生成された文字列を Firebase Functions で `GITHUB_WEBHOOK_SECRET` に設定します。
```bash macOS
firebase functions:secrets:set GITHUB_WEBHOOK_SECRET
```
次に、この文字列を GitHub App の Webhook Secret に設定します。
Webhook の設定は、次のようになれば完了です。
 #### GITHUB\_PRIVATE\_KEY
GitHub App の Private Key を作成します。これは次の手順でも使用します。
#### GITHUB\_PRIVATE\_KEY
GitHub App の Private Key を作成します。これは次の手順でも使用します。
 この Private Key を Firebase Functions で `PRIVATE_KEY` に設定します。
本来であれば、Secret は firebase CLI で登録するべきですが、現在の CLI は `.pem` ファイルの読み込み時にクラッシュします。そのため、GCP Secret Manager から GUI を使用して登録してください。
すべての Secret を設定したら、Firebase Functions をデプロイします。
```bash macOS
cd apps/firebase_functions/functions
firebase deploy --only functions
```
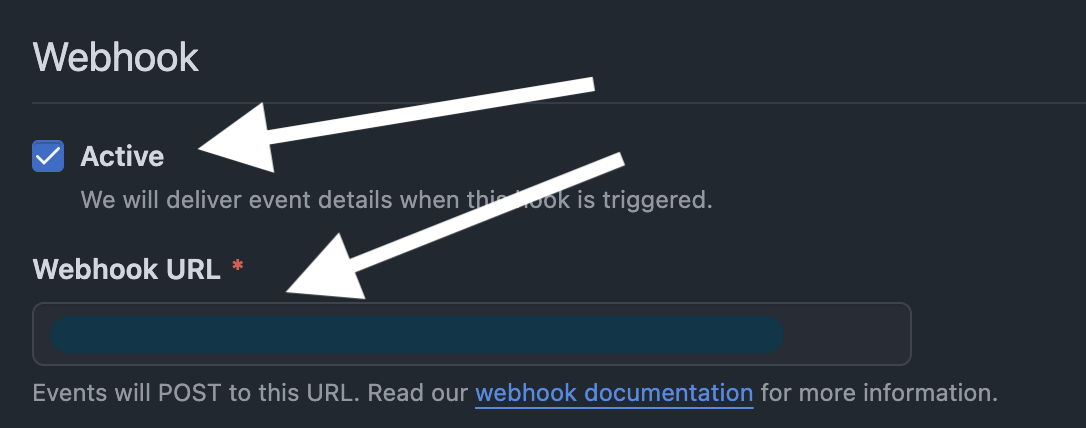
最後に、Firebase Functions の `gitHubAppFunction` の URL を、GitHub App の Webhook URL として指定します。
チェックボックスにチェックを入れるのを忘れないでください。
この Private Key を Firebase Functions で `PRIVATE_KEY` に設定します。
本来であれば、Secret は firebase CLI で登録するべきですが、現在の CLI は `.pem` ファイルの読み込み時にクラッシュします。そのため、GCP Secret Manager から GUI を使用して登録してください。
すべての Secret を設定したら、Firebase Functions をデプロイします。
```bash macOS
cd apps/firebase_functions/functions
firebase deploy --only functions
```
最後に、Firebase Functions の `gitHubAppFunction` の URL を、GitHub App の Webhook URL として指定します。
チェックボックスにチェックを入れるのを忘れないでください。
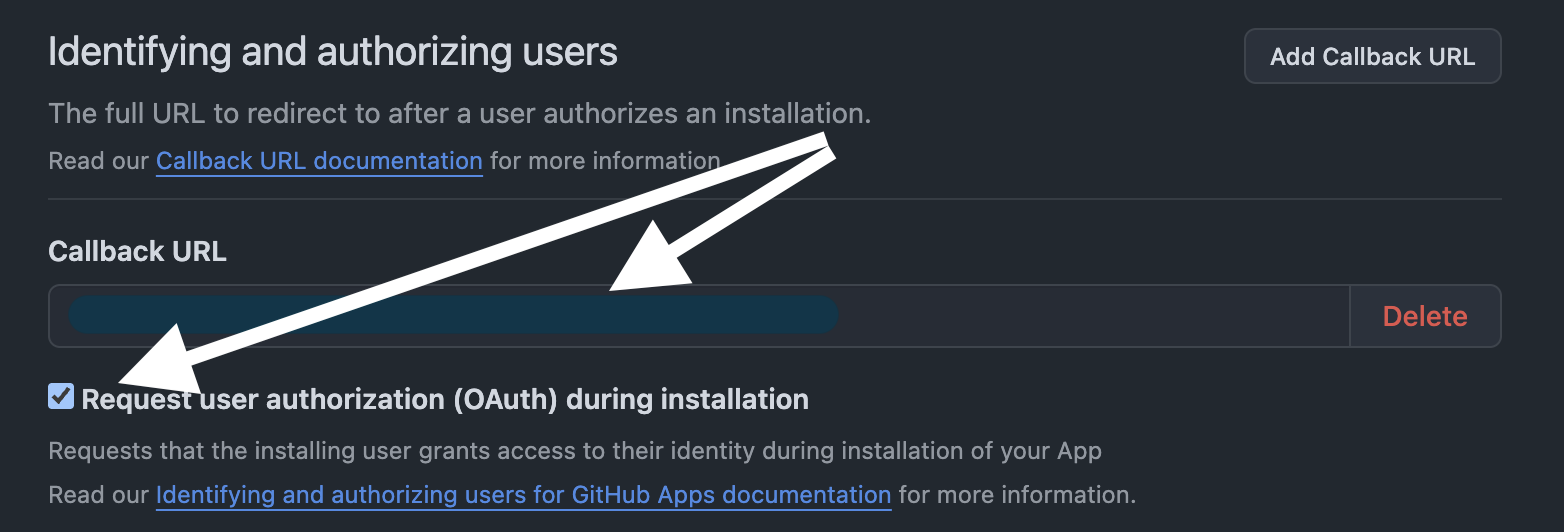
 #### Callback URL
Callback URL は、Firebase Functions の `githubCallbackFunction` の URL です。
チェックボックスにチェックを入れるのを忘れないでください。
#### Callback URL
Callback URL は、Firebase Functions の `githubCallbackFunction` の URL です。
チェックボックスにチェックを入れるのを忘れないでください。
 ### Firebase サービスアカウントの作成 (Create a Firebase Service Account)
Firebase サービスアカウントを作成し、任意のディレクトリに配置します。
これで、OpenCI のセルフホストの準備は完了です。
### Firebase サービスアカウントの作成 (Create a Firebase Service Account)
Firebase サービスアカウントを作成し、任意のディレクトリに配置します。
これで、OpenCI のセルフホストの準備は完了です。