> ## Documentation Index
> Fetch the complete documentation index at: https://docs.open-ci.io/llms.txt
> Use this file to discover all available pages before exploring further.
# Getting Started
> Welcome to the OpenCI documentation
## Prerequisites
To self-host OpenCI, you need to meet the following prerequisites:
* Mac with M1 or later
* macOS 14.0 or later
## Initial Setup
To self-host OpenCI, you need to install some tools.
### Tart
Tart is a tool for managing macOS VMs.
```bash macOS
brew install cirruslabs/cli/tart
```
### Firebase CLI
OpenCI uses Firebase, so you need to install the Firebase CLI.
```bash macOS
curl -sL https://firebase.tools | bash
```
### OpenCI Runner
OpenCI Runner is a CLI for running OpenCI. Dart is required for installation.
```bash macOS
dart pub global activate openci_runner
```
```bash install Dart
brew install dart-sdk
```
### Download Base Image
OpenCI uses macOS 15.0 as its base image. This takes a considerable amount of time.
```bash macOS
tart pull ghcr.io/open-ci-io/sequoia:0.0.4
```
## Firebase Configuration
OpenCI uses Firebase for its backend and other components. Therefore, Firebase needs to be configured.
### Create a Firebase Project
Access the [Firebase site](https://console.firebase.google.com/) with any Google account and create a project.
### Firestore Configuration
Firestore is used to register build jobs. Therefore, access Firestore and provision it.
### Firebase Functions Configuration
OpenCI uses Firebase Functions. Using Firebase Functions requires registration for the Blaze plan (paid). The cost is approximately a few yen per month.
### Firebase Initialization
After creating a Firebase project, specify the project to use.
```bash macOS
firebase use project-id
```
### Firebase Functions Deployment
Clone the OpenCI CLI repository.
```bash macOS
gh repo clone open-ci-io/openci
```
## GitHub App Configuration
OpenCI uses a GitHub app to retrieve build jobs.
### Create a GitHub App
Access [GitHub app creation](https://github.com/settings/apps/new) and create a GitHub app.
## Secret Configuration
Register the GitHub app secrets used by Firebase Functions in Google Cloud's Secret Manager.
Navigate to `/apps/firebase_functions/functions/`
#### CLIENT\_ID
The Client ID of the GitHub app.
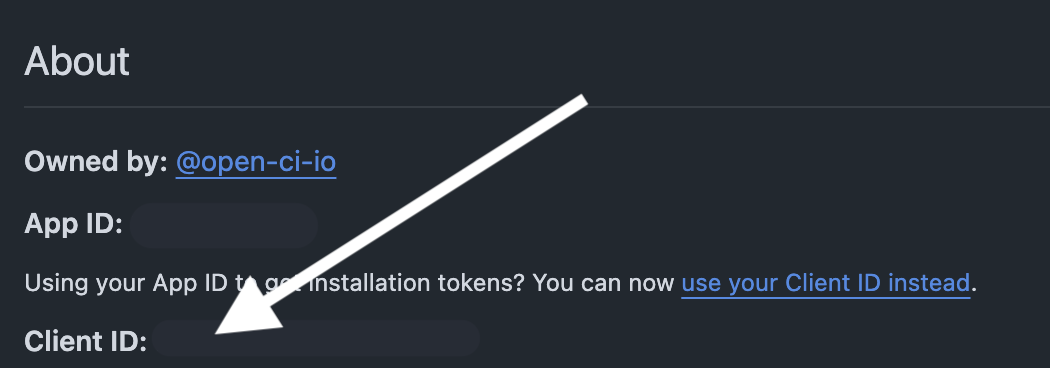 ```bash macOS
firebase functions:secrets:set CLIENT_ID
```
#### CLIENT\_SECRET
The Client Secret of the GitHub app. You need to generate it.
```bash macOS
firebase functions:secrets:set CLIENT_ID
```
#### CLIENT\_SECRET
The Client Secret of the GitHub app. You need to generate it.
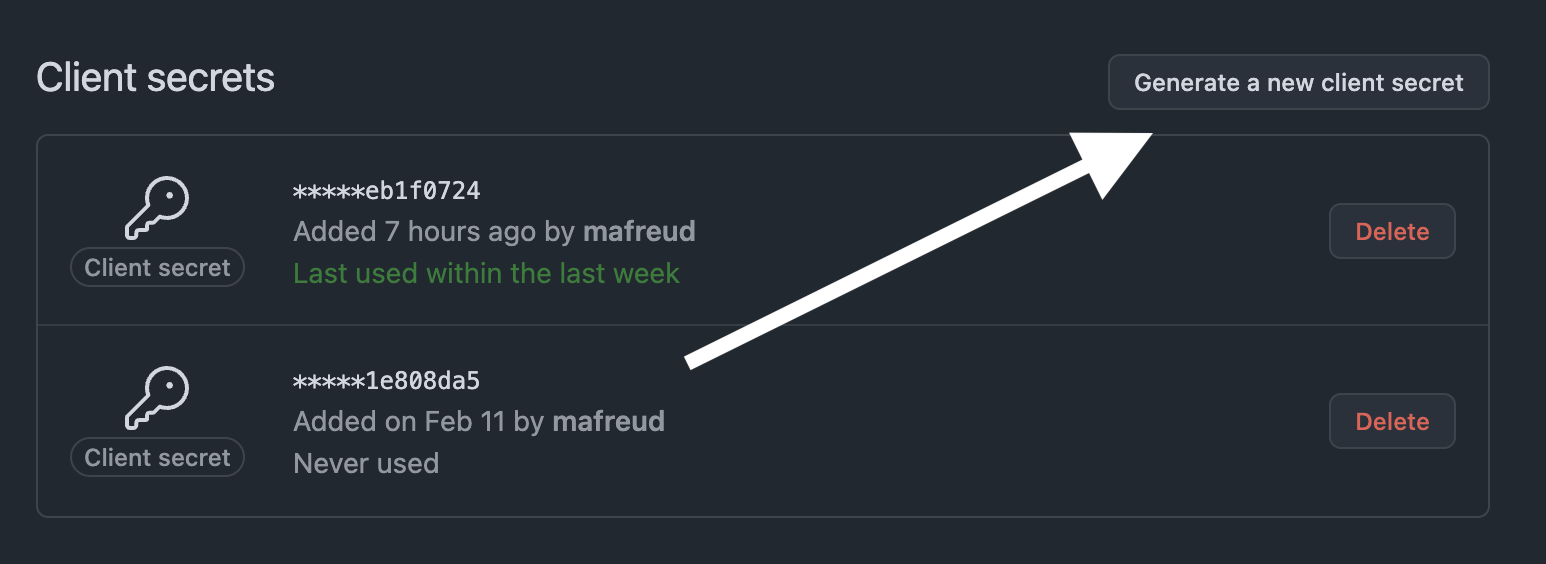 ```bash macOS
firebase functions:secrets:set CLIENT_SECRET
```
#### GITHUB\_APP\_ID
```bash macOS
firebase functions:secrets:set APP_ID
```
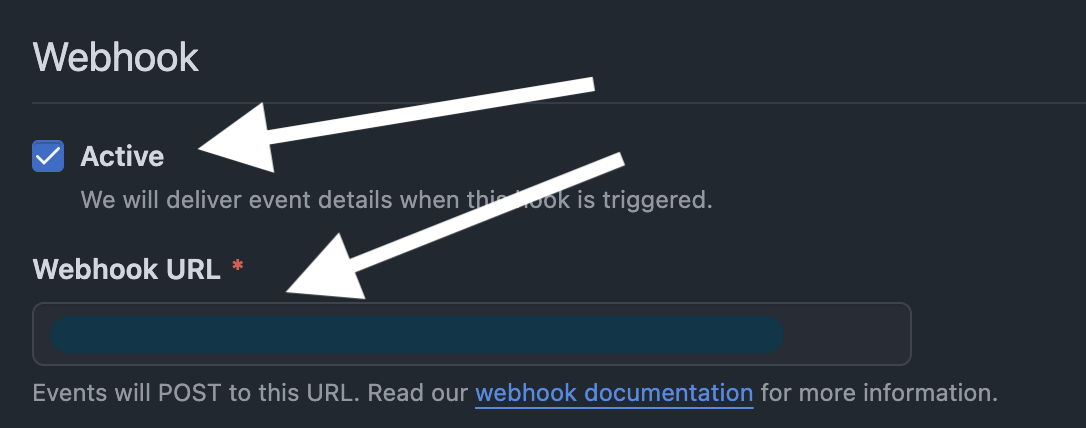
#### GITHUB\_WEBHOOK\_SECRET
A "secret random string" used to verify the authenticity of Webhooks sent from GitHub.
Generate a string as follows:
```bash macOS
openssl rand -hex 32
```
Set the generated string to `GITHUB_WEBHOOK_SECRET` in Firebase Functions.
```bash macOS
firebase functions:secrets:set GITHUB_WEBHOOK_SECRET
```
Then, set this string to the Webhook Secret in the GitHub app.
The Webhook configuration is complete when it looks like the following:
```bash macOS
firebase functions:secrets:set CLIENT_SECRET
```
#### GITHUB\_APP\_ID
```bash macOS
firebase functions:secrets:set APP_ID
```
#### GITHUB\_WEBHOOK\_SECRET
A "secret random string" used to verify the authenticity of Webhooks sent from GitHub.
Generate a string as follows:
```bash macOS
openssl rand -hex 32
```
Set the generated string to `GITHUB_WEBHOOK_SECRET` in Firebase Functions.
```bash macOS
firebase functions:secrets:set GITHUB_WEBHOOK_SECRET
```
Then, set this string to the Webhook Secret in the GitHub app.
The Webhook configuration is complete when it looks like the following:
 #### GITHUB\_PRIVATE\_KEY
Create a Private Key for the GitHub app. You will also use this in the next step.
#### GITHUB\_PRIVATE\_KEY
Create a Private Key for the GitHub app. You will also use this in the next step.
 Set this Private Key to `PRIVATE_KEY` in Firebase Functions.
Originally, you should register the Secret with the firebase CLI, but the current CLI crashes when reading `.pem` files. Therefore, register it from the GCP Secret Manager using the GUI.
After setting all the Secrets, deploy Firebase Functions.
```bash macOS
cd apps/firebase_functions/functions
firebase deploy --only functions
```
Finally, specify the URL of Firebase Functions' `gitHubAppFunction` as the Webhook URL for the GitHub app.
Don't forget to tick the check box.
Set this Private Key to `PRIVATE_KEY` in Firebase Functions.
Originally, you should register the Secret with the firebase CLI, but the current CLI crashes when reading `.pem` files. Therefore, register it from the GCP Secret Manager using the GUI.
After setting all the Secrets, deploy Firebase Functions.
```bash macOS
cd apps/firebase_functions/functions
firebase deploy --only functions
```
Finally, specify the URL of Firebase Functions' `gitHubAppFunction` as the Webhook URL for the GitHub app.
Don't forget to tick the check box.
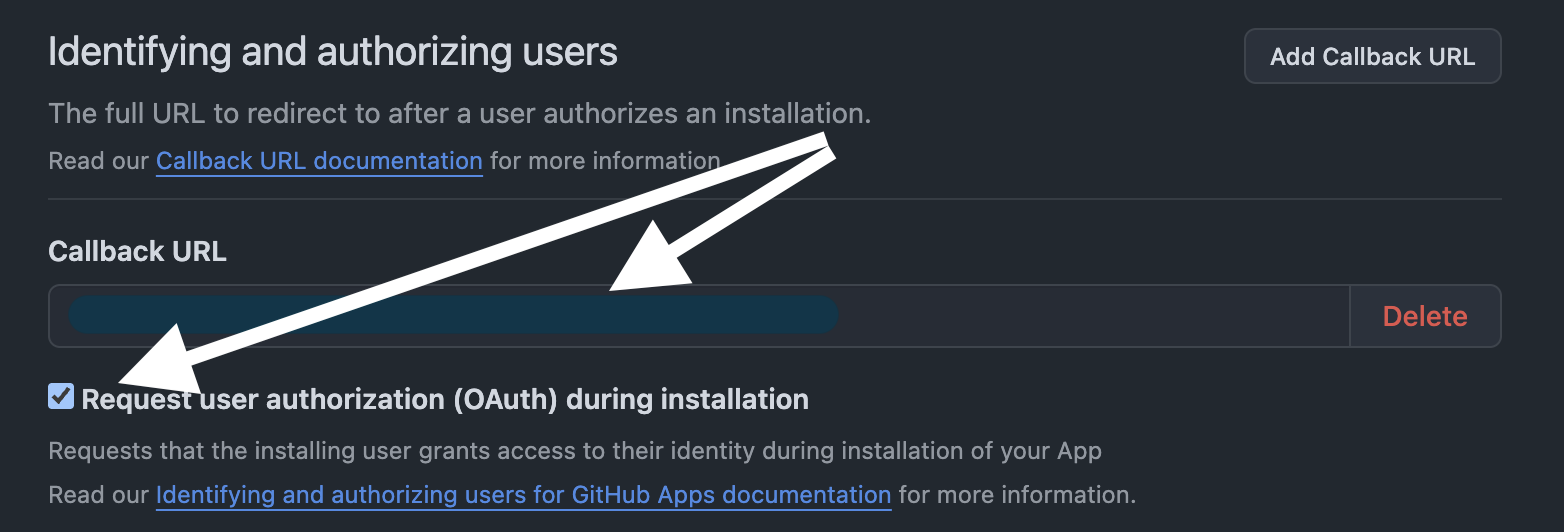
 #### Callback URL
The Callback URL is the URL of Firebase Functions' `githubCallbackFunction`.
Don't forget to tick the check box.
#### Callback URL
The Callback URL is the URL of Firebase Functions' `githubCallbackFunction`.
Don't forget to tick the check box.
 ### Create a Firebase Service Account
Create a Firebase service account and place it in an arbitrary directory.
With this, the preparation for self-hosting OpenCI is complete.
### Create a Firebase Service Account
Create a Firebase service account and place it in an arbitrary directory.
With this, the preparation for self-hosting OpenCI is complete.